
Starting a new job with a contractor always comes with a learning curve, but one thing that immediately stood out on this site was their requirement to check all rotating laser levels every two weeks. It was a refreshing change from many of the contractors I’ve worked with in the past, where laser levels were often assumed to be accurate for months on end without any verification. In reality, even the best-calibrated laser levels can drift out of alignment due to knocks, vibrations, or general wear and tear—so having a regular testing process in place is essential for maintaining accuracy on-site.
To make these levelling checks as efficient and repeatable as possible, I decided to set up datum points at a fixed level of 100.000m A.O.D., spaced nearly 50m apart. This provided a known reference that I could use to quickly and reliably verify whether each laser level was performing within tolerance.

For this task, I turned to a Leica TCRP1205 robotic total station, a piece of kit I’ve relied on for years. Unlike rotating laser levels, which are often seen as “quick and easy” tools for general site work, a high-precision total station allows for millimetre-accurate setups—perfect for establishing a trusted baseline. Before placing the retro targets at the datum level, I took care to precisely mark the levels on the structures. This step was critical because even the best laser level is useless if it’s being compared to an inaccurate reference point.
The Leica TCRP1205 itself had recently been calibrated by a specialist I trust (not Speedy Hire!), so I had full confidence that my datums were correct. I’ve used this total station for many years, and it has consistently provided reliable, repeatable results, making it the ideal instrument for setting up an accurate test environment. With the datums established, I could now begin testing each rotating laser level to see whether they were up to standard—or, as I would soon find out, falling short.
Setting Up the First Check
With my system in place, I set up the first rotating laser level for testing. The tripod had to be on solid ground, away from plant movement or vibrations. I ensured the top of the tripod was level—this is something I always check because even the best laser won’t give accurate readings if the setup is poor.
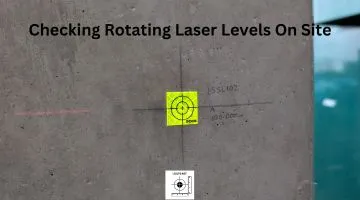
Once the tripod was stable, I secured the rotating laser level onto it and powered it on. I made sure any grade settings were at 0% to get a true horizontal reference. Then, I used a laser receiver set to fine tolerance mode to check the first datum, marking the laser’s height on the nearby wall.
Moving to the second datum 50m away, I adjusted the receiver again to find the laser beam. This was the moment of truth—if the reading matched 100.000m, the laser was performing well. If it was off, even by a couple of millimetres, further investigation was needed.

Rotating the Laser for a Cross-Check
After the first measurement, I returned to the laser and rotated it 90 degrees, repeating the process to check a different plane. I did this three more times, ensuring that the laser was accurate in all directions.
For most well-calibrated lasers, the marks should be consistent. If there was any deviation beyond the manufacturer’s tolerance (typically 1.5mm over 30m), it meant the laser was either out of calibration or had been knocked out of alignment.
Unexpected Results with a Hired Laser
One of the lasers I tested that day was a Leica Rugby 620, recently hired from Speedy Survey. Given that we had already returned a Hilti PR 300-HV2S because it was frustrating to use, I was hoping for a smooth experience this time.
Unfortunately, the Leica Rugby 620 was right on the edge of acceptable accuracy. It just about passed, but only just—I expected much better from a recently calibrated survey instrument. I’ve tested many laser levels over the years, and most perform within 1.5mm over 30m, yet this one was barely making the cut.
Why Regular Checks Matter
This experience reinforced why it’s so important to check rotating laser levels before relying on them. Many people assume that because a laser has come straight from hire or calibration, it must be accurate—but that’s not always the case. Regular on-site checks can catch issues before they cause costly mistakes.
For a step-by-step guide on how to check rotating laser levels, see my full how-to post here.
What to Do If a Laser Level is Out of Calibration
If a laser level fails a site check, you have a few options:
- Consult the manual – Some models allow for minor adjustments.
- Recalibrate in a controlled environment – If small adjustments are possible, follow the manufacturer’s procedure.
- Send it for professional servicing – If the error is significant, return it to a survey equipment specialist for recalibration.
Final Thoughts
Checking rotating laser levels on-site is a simple but crucial task. A few minutes spent verifying accuracy can save hours of rework and costly mistakes. This experience also reinforced a valuable lesson: just because a laser has been hired or recently calibrated doesn’t mean it’s perfect—always test before trusting it.
